
Adding and Editing Images with the Image Web Part
The Image web part simplifies the process of adding visual elements to your SharePoint Online pages. Here’s how you can set it up:
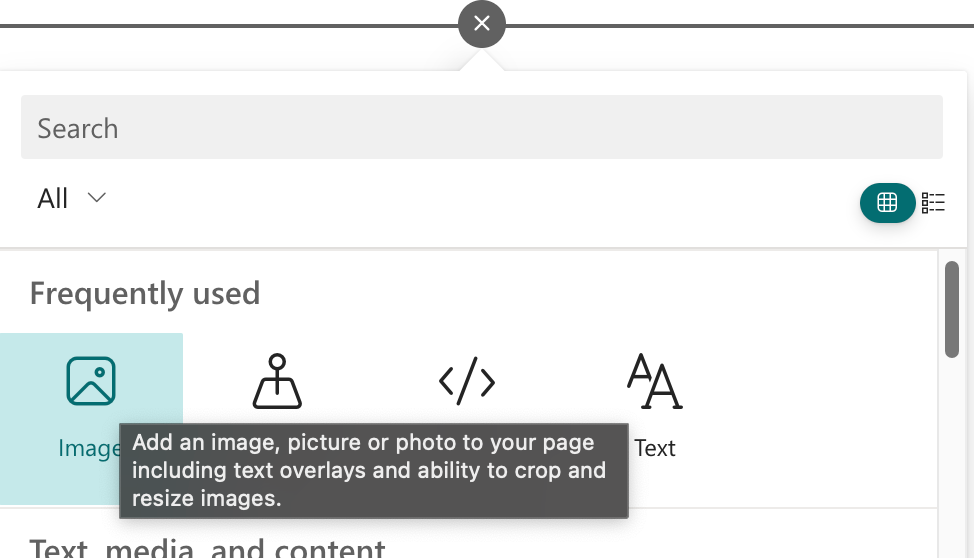
Inserting an Image
Navigate to the page where you want to add an image and select “Edit” at the top right of the page to enable editing mode. Choose the section you want to insert the Image web part and click the “+” sign to add a new web part. Select “Image” from the list of available web parts.
Editing an Image
Once the image is inserted, you might want to fine-tune its appearance. Click the ‘Advanced editing’ to access the editing options. From there, you can:
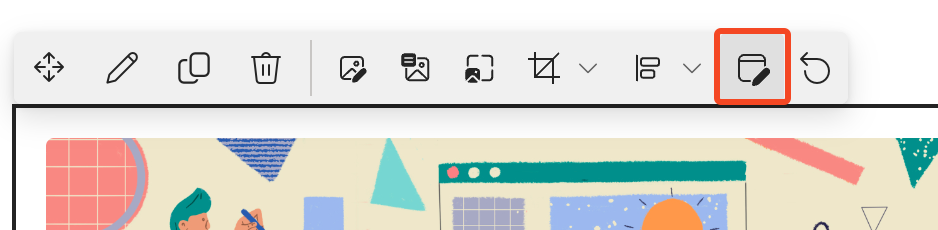
- Crop: Adjust the framing of your image to focus on the most important elements.
- Adjustment: Modify brightness, contrast, and saturation to ensure your image stands out or blends in with the overall design.
- Filters: Apply filters for artistic effects or to conform to your branding guidelines.
- Markup: Add shapes, lines, and text to your image to highlight specific elements.

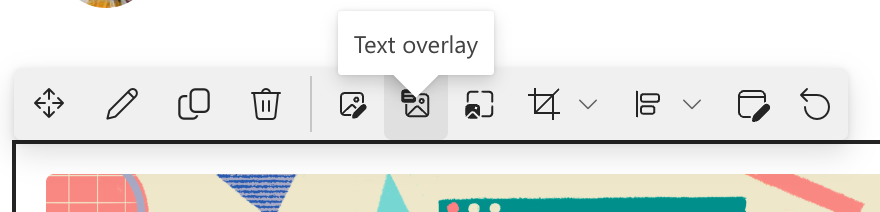
Adding Text Overlays
Enhance your images by adding text directly over them. While in the edit mode of the Image web part, you’ll find an option to “add text over the image.” Click on it, and a text box will appear on your image where you can enter your desired text. This feature is particularly useful for headers, announcements, or to convey additional context.
Configuring Accessibility
It’s crucial to ensure that your images are accessible to all users. When editing the Image web part, add descriptive alternative text that accurately represents the image content for users who use screen readers.
Saving Your Edits
After making all your edits, don’t forget to save your changes. You can publish or republish the page to make the changes live or you can ‘Save as draft’ to work on this page later.
Conclusion
The Image web part in SharePoint Online is a powerful tool that, with its new editing capabilities, can significantly enhance the visual impact of your pages. By following these detailed steps, you can effectively use images to complement your textual content, make your pages more engaging, and ensure they are inclusive for all users.